
Broadcast Television is a stupid medium. By watching it you make yourself stupid. The reason the world is in the stupid state it’s in, is because of broadcast TV. It’s a prison-industrial propaganda machine that sucks the life out of people both as individuals, and as a society, and we have to kill it. Or at least stop watching it.
But we kindof need TV – or something like it, because otherwise we have to fill all the empty space with talking, and there’s far too much talking going on as it is. I find it exhausting.
So fairly cool thing to do is to turn your tv into another window onto the web.
So.
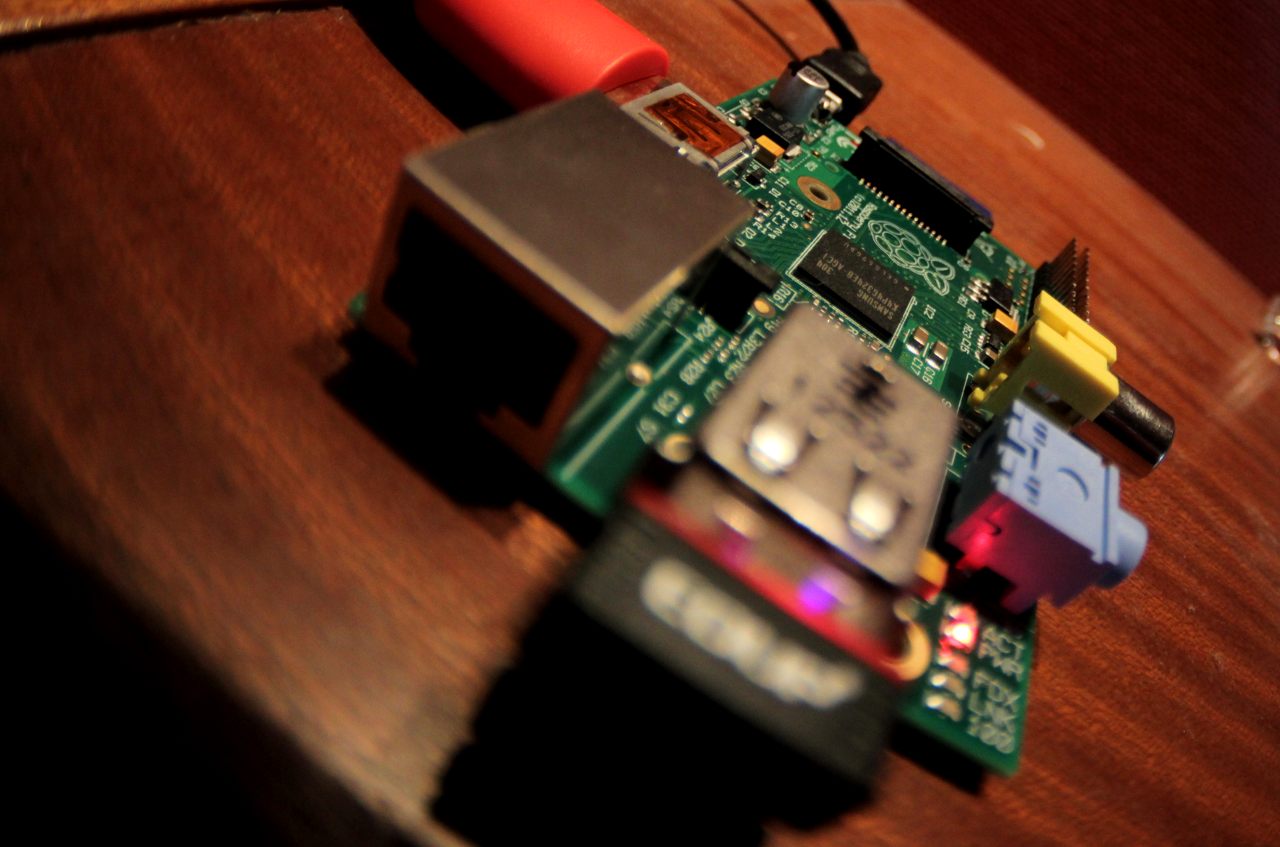
1) $35 : Raspberry Pi (unless you live in NZ, in which case, $55)(everything’s a rip-off here)
2) $45 : Wifi dongle, cables, SSD cards – bought as kit to save excess thinking
3) $40 : wifi keyboard/touchpad
You can probably find better deals than this on ebay… but there’s the whole “Not having to think” thing – especially for your first attempt etc. There’s the other advantage that you probably only need to buy this stuff once.
So… plug it all in. Plug the HDMI into the TV… it boots up (random words, random words)… enter password and ‘startx’… bingo. It works. Connect to your local router… and you’ve got the internet on your TV. It took me all of 5 minutes to go from darkness to light. The hardest part was finding out the password (pi / raspberry) which the vendor had written on a bit of paper.
…
Caveats:
1) It’s a tiny little computer without graphics acceleration… so it won’t play youtube out of the box… . You’re probably best off using a 2nd hand laptop… but a Pi is a Pi. There’s the cool-factor.
2) Here’s how to get a raspberry Pi to play youtube.
How to get a raspberry Pi to play youtube
Sub Caveats:
1) I used Weezy as my Pi OS. The instructions I used were written for other OSs. Try it and see.
2) You will need to use the command line. It’s linux. It’s tinkering-edge.
3) You will save yourself a whole lot of hair, by SSHing to your pi with your laptop, rather than trying to use the little keyboard directly.
So. The way this setup works is that there’s a CLI video player that can stream files. There’s a linux app that downloads youtube videos. There’s chrome, which tells the downloader what to dowload.
The instructions below are cobbled together from all over the web – mainly here – which also has explanations.
1) SSHing to your Raspberry Pi
You need its IP address. You can find this by opening WIFI_config on your Pi… and it’s the IP address at the bottom of the Current Status tab. (if that fails, use ifconfig from the CLI). You then (using your own ip) type the following into a terminal on your laptop:
(copy each line from the black boxes and hit enter)
Enter your password (probably “raspberry”), and you’re in. From now on, you can use the CLI from your laptop.
2) Get latest versions etc
sudo apt-get upgrade
3) Install the various apps
sudo apt-get install sqlite3
sudo apt-get install youtube-dl
sudo youtube-dl -U
cd ~
wget http://omxplayer.sconde.net/builds/omxplayer_0.2.5~git20130223~b1aec105_armhf.deb
sudo dpkg –-install omxplayer_0.2.5~git20130223~b1aec105_armhf.deb
rm omxplayer_0.2.5~git20130223~b1aec105_armhf.deb
I found upgrading youtube-dl (with -U) to be vital. The last block is installing Omxplayer – which is the thing that plays 1080p full-screen videos. Instructions controls etc here.
4) Make a script to pull the various parts together
a) make a script file in ~/bin (make it if it isn’t there)
cd ~/bin
nano omxplayyt.sh
b) copy this lot into it and “Ctrl-x”, y to save
#Script to play YouTube using OMXPlayer
echo “Loading YouTube Video…”
cp ~/.config/chromium/Default/History ~/History.tmp
omxplayer -o hdmi $(youtube-dl –max-quality 35 -g $(sqlite3 ~/History.tmp ‘SELECT url FROM urls ORDER BY last_visit_time DESC LIMIT 1’))
rm ~/History.tmp
This is a crafty bit of sorcery that searches your browser history for the last video (using sqllite)…. pulls it down (using youtube-dl)… and displays it (using omxplayer). The ‘-o hdmi’ bit outputs sound via the hdmi cable.
This script needs to be executeable
5) Make an icon to launch it
nano omxplayyt.desktop
Copy this into it
Type=Application
Name=OMXPlayYT
GenericName=OMXPlayYT
Comment=Open YouTube url in OMXPlayer
TryExec=lxterminal
Exec=lxterminal –geometry=25×1 -t OMXPLAYYT –working-directory=/home/pi/bin -e ./omxplayyt.sh
NStartupNotify=true
Categories=Utility;Player;
Icon=youtube_48
Encoding=UTF-8
Ctrl-x, y to save.
The Icon line should be a path to a youtube (or whatever) icon. I used this 
You can add this icon to the bar at the bottom, by right-clicking the bar, selecting ‘Application Launch Bar’ and clicking ‘edit’ >> LHS column=items in launch bar, RHS column=all applications. Choose ‘OMXPlayYT’ under ‘Accessories’… click add. (then close, close)
The new icon should appear in the bar at the bottom of the screen.
And that’s it.
You can run videos by navigating to them using chrome… Once you see the “no flash” message, the page should be in your browser history. Click the new icon… a couple of seconds later, it’ll be running the video.
Works for me.
So there’s a whole lot of fluffing about… and this isn’t going to see mass-uptake any time soon, but it’s an open-device. It’s an open computer – which the likes of Apple are trying to emasculate, and all the anally retentive copy-monopolists are bribing politicians by the bushel to contain. There are already “raspberry pi” media centers for sale around the place… for about the same price as the component parts here. I’m guessing this is the future for a while… a little box the size of a cigarette packet that sits next to your tv.
I’m also guessing that it will be sitting on top of an n-terrabyte external hard-drive, which has something like BTSync running full-time… with an automated process to take daily/weekly/monthly snapshots. Automatic backup etc.
 On Addiction
 And The Void Mooned Back...
 The Spirit Of The World
 A Machine to Steal Souls
 More Anti Digital
 Thync
Thync Robotic Sensory Loops and Whatnot
 Cartestian Robot Roundup.
 Post-Scarcity Link-Dump
 Servo Bender